Creating an Extended Events Session
Creating an extended events session is pretty straight forward with SQL Server 2012 as Microsoft has finally introduced a graphical user interface. During my time as a DBA, I often needed to create a quick trace to capture query activity for a particular table. So, let’s run through how we might do this with extended events!
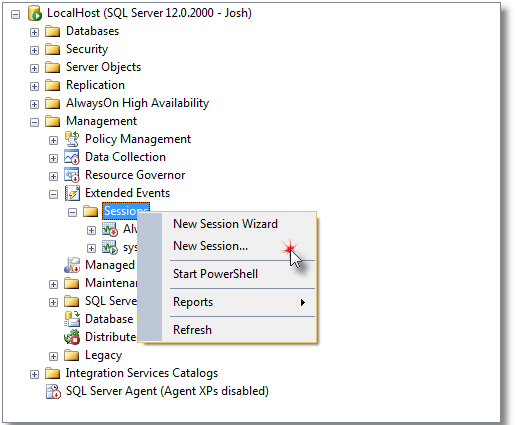
Firsts thing first, we need to is open us SQL Server Management Studio, connect to a SQL Serverrunning SQL 2012 or above and then browse down to Server->Management->Extended Events->Sessions. Here you will want to right-click then select “New Session”.
General
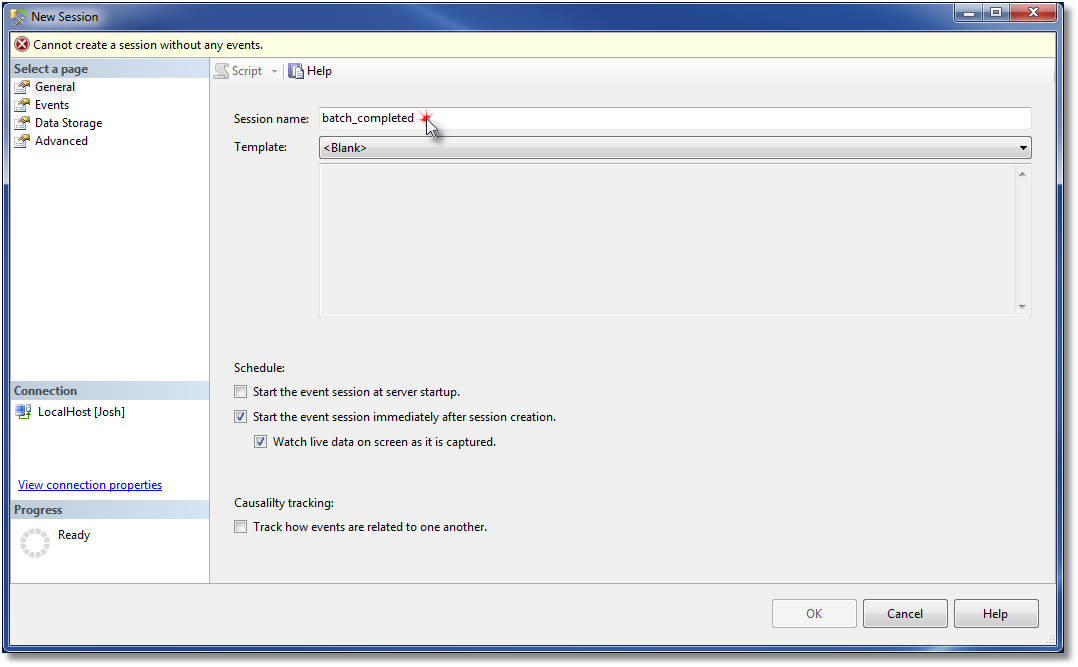
On this setup page, give the session a name and also select some of the general options. For this example, I am going to select “Start the event session immediately after session creation” because this will save me the time it take so start it manually. I will also select “watch live data on screen as it is captured”. We can easily open the live-view later, but this option will save you a step.
Click “Events” on the left to precede.
Events
This is where we get into the meat of extended events. Here we will select the event(s) that we want to capture on the left and add them to our “selected events” list on the right. For this example, I typed in “completed” in the event library search box to quickly pair down the event that I am interested in. Select “sql_batch_completed” and then add it to the list via the “>” button.
Click “Configure” on the top right to precede.

Events: Configure
If you want, you can skip this step entirely in order to capture all of the selected event data with no filtering.
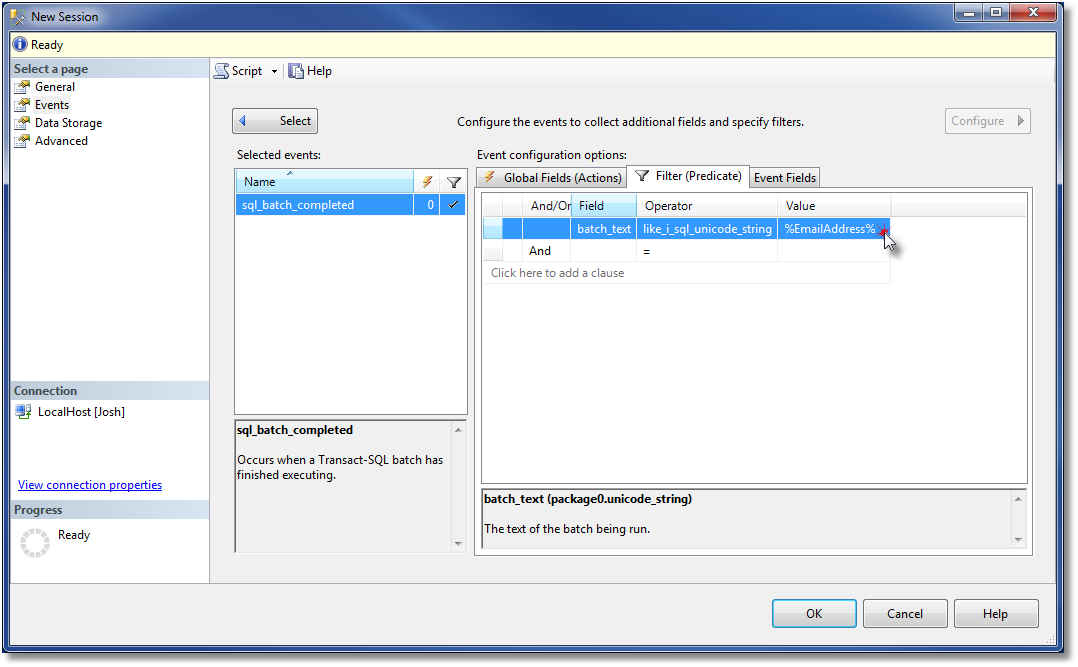
I’m have a local copy of the AdventureWorks database, so I’m going to add a filter on %EmailAddress%.
On the left, select the even that you want to configure and then click on the “Filter” tab on the right. To add filter predicate, click the drop-down menu in the “Field” column of the grid and select “batch_text”. Now, select “like_i_sql_unicide_string”. While the name is a bit long, this is simply a case insensitive like clause on a Unicode string. Type in a value and we are done on this page.
Click “Data Storage” on the left to precede.
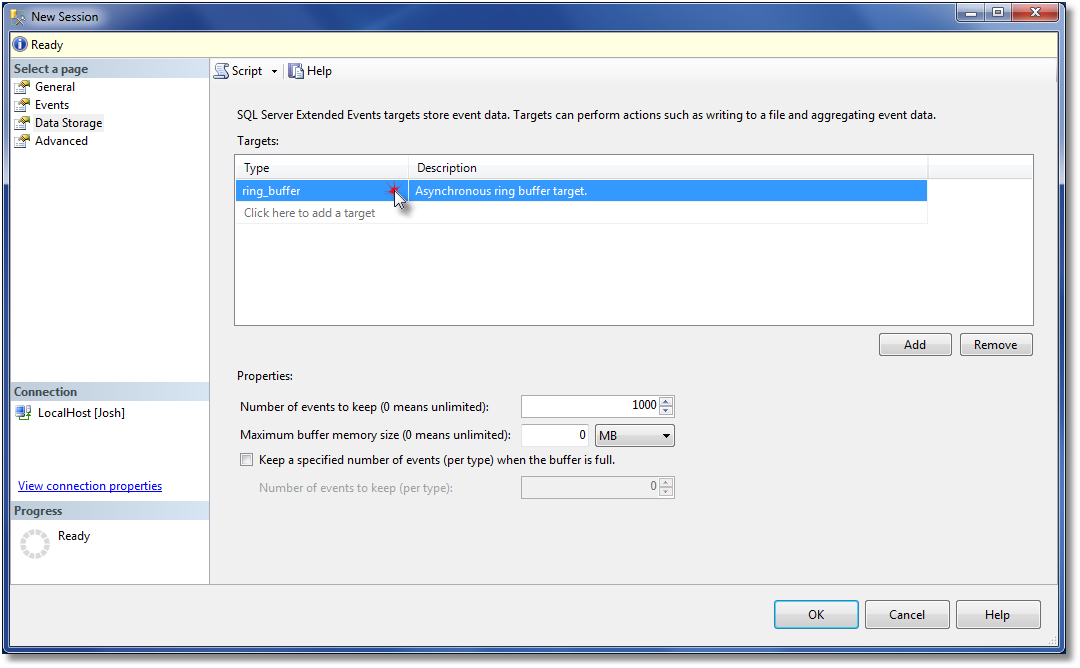
Data Storage
On this page, we want to specify how the collected data is stored. There are many options available, but the details of each is out of the scope of this example.
I’m going to go with ring_buffer for this example because it’s very straight forward and allows me to easily specify a maximum number of events without worrying about filling up my database or disk drive.
Advanced
The advanced page is once again out of scope. I’m an effort to be concise, we didn’t touch on many of the configurable options in any of these steps.
Click “Ok” on the bottom right to precede.
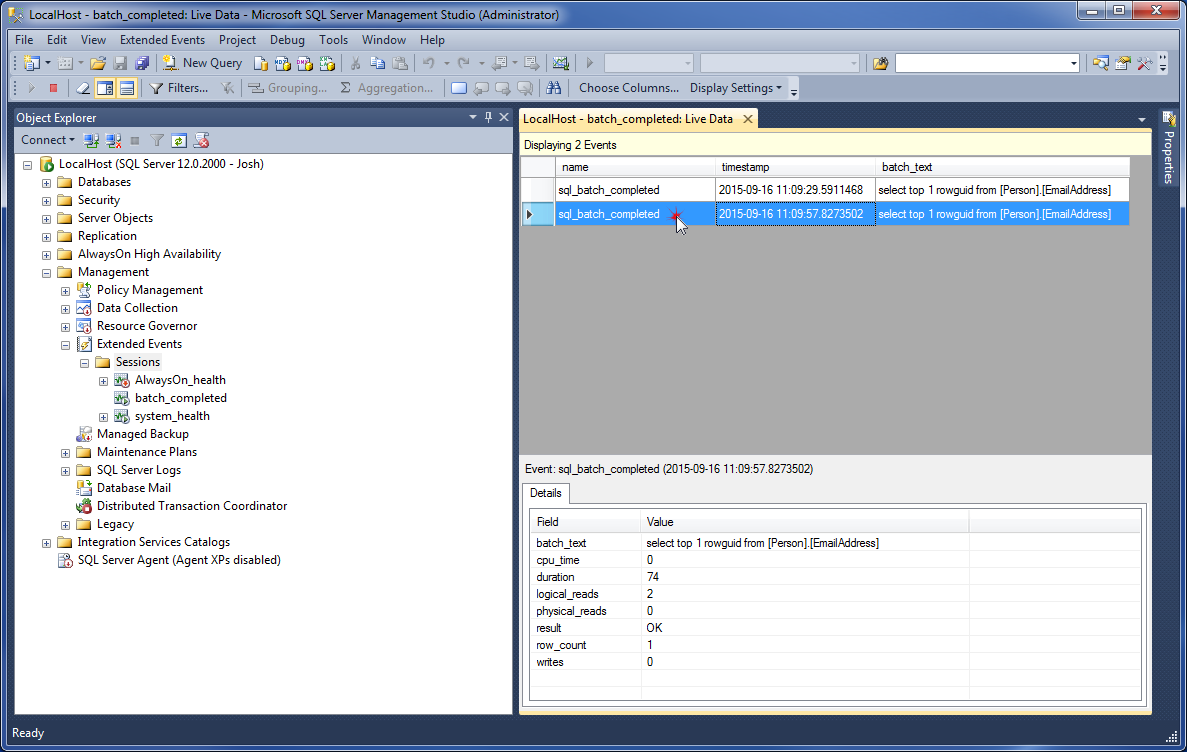
Live Data
At this point, you should have the EV live data viewer open. If not, then click on the new session that we created in the server explorer tree and click “Watch Live Data”.

From this window you can view the occurrences of the events which you selected. The top grid portion shows the events themselves while the bottom grid shows details about the currently highlighted event.
Personally, I think the most important thing you should know here is that you can add columns from the bottom grid onto the top grid by right-clicking on the top grid column headers and selecting “choose columns”.
Also note that when you are in the Live Data view, that you now have a new toolbar in SSMS. Be sure to play around with “Filters” at the very least!